Thermostat, Belts and Coolant Replaced

For a fully illustrated guide to the work carried out in this post, check out my E46 how-to guide site - Thermostat (Coolant) - Removal and Replacement
--

Since I bought the car the mpg has been gradually worsening, from an initial mpg of 38 down to 32.

The car was also not getting up to temperature any where near quick enough. The car should be up to full running temp in around 3 - 4 miles, with the gauge sitting at the 12 o'clock position. The OBC (on board computer) can be manipulated to show the current engine temperature.

Instructions to access the hidden OBC functions for an E46 BMW 3 Series :
 
  1. Hold the trip reset stalk, the left of the two stalks in the dash dial cluster, while turning ignition to the on position 
  2. The OBC should now show "Test" in the top left
  3. Press the trip reset stalk to scroll through and select function 19.0, this unlocks all the features
  4. Wait for OBC to show "Off" 
  5. Press the trip reset stalk quickly once 
  6. Then without pausing press the trip reset several times to select function 7, which shows temperature and speed

The ideal temp range is 88 - 92. Mine was reaching 86 after 12 miles of driving. 

These symptoms suggested that the thermostat was broken. I did a little research and it was suggested that you change the belts whilst you are at it, as you have to strip the engine back to reveal them anyway.

As the thermostat was coming off, it is necessary to drain the coolant. I was aware that BMW's need specific antifreeze, so I researched into this as well. 

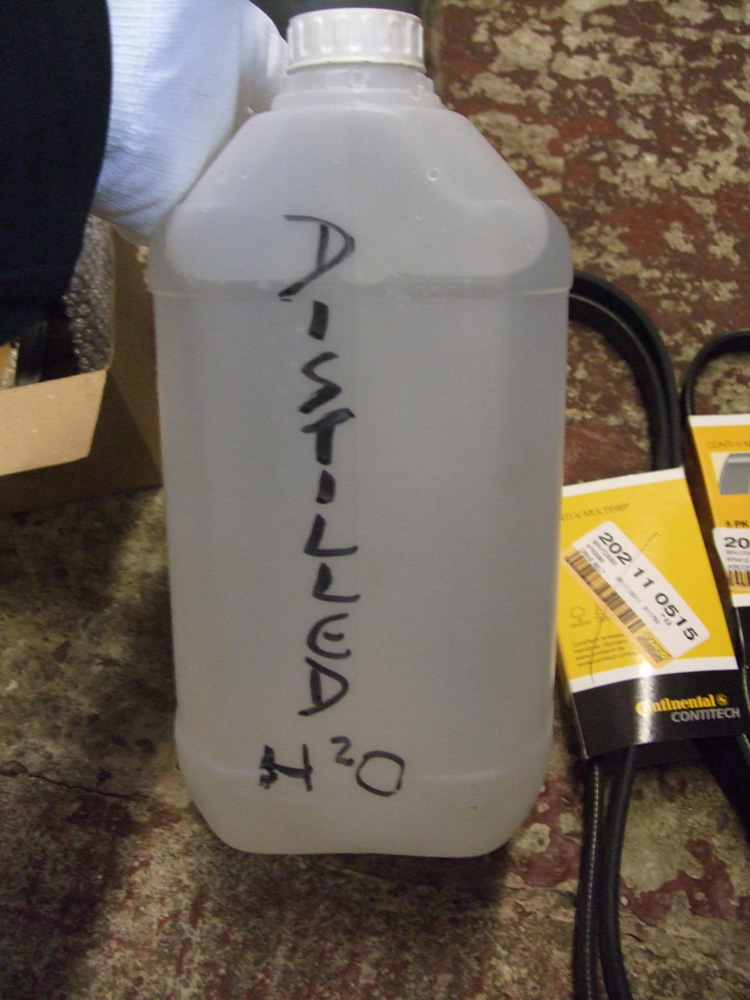
I phoned BMW and asked for a price on the antifreeze they supply, for 1.5 litres it came to £9.90. Quite steep when the system takes 10.2 litres of coolant mixture at 50/50 mix. So I looked for an alternative and found Comma's Xstream range. Comma's website suggested G48 for the 330d, so I went and picked up 5L for £19.99. You can see the Comma fact sheet on Xstream G48 here. It was also made clear that distilled water must be used, not ordinary tap water, as this can corrode the system.

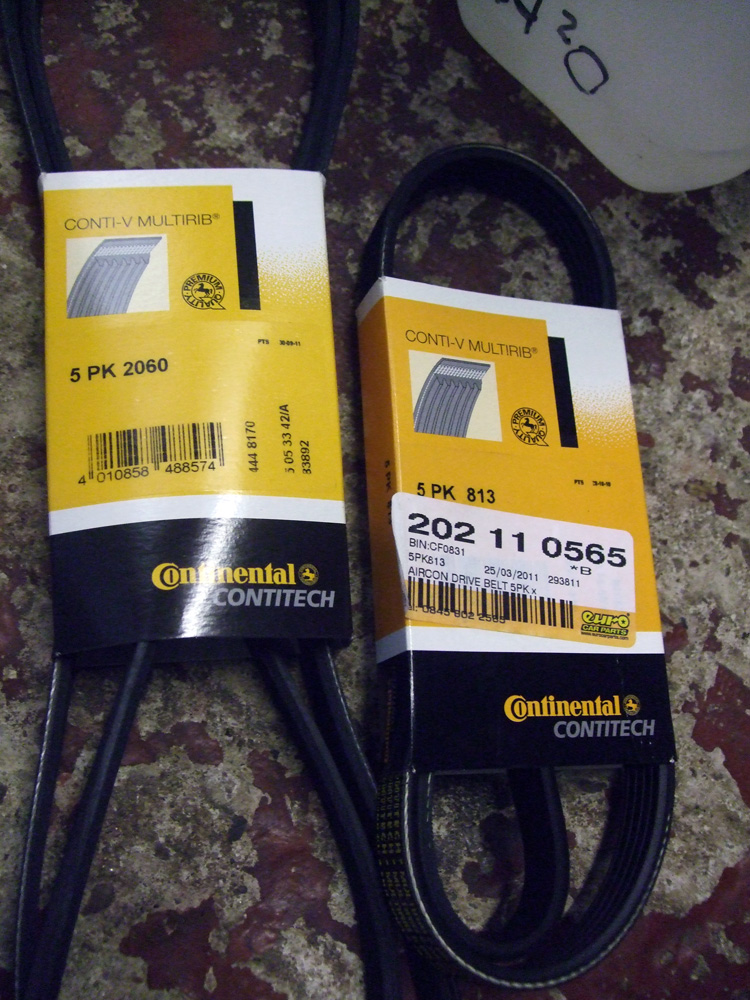
I then went and sourced the belts and thermostat from eurocarparts for £70. So, here is the complete parts list ready to be fitted.


First thing to do was get the car jacked up and remove all the engine plastics and the under car covers. 

Then remove the fan shroud and viscous fan. You'll need two 32mm spanners, one with a crank in it to get access to the two nuts securing the fan. They are pretty tricky to get to, as you can see below. 


To remove the fan shroud you have to use a Torx T20 to undo the screw on the top drivers side. There is also a right pain of a plastic clip to remove on the passenger side. Pull the centre pip out and then the main part.


With the fan and shroud removed I started draining the coolant using the radiator drain plug, expansion tank plug and the engine block drain plug. 


I was expecting to get out about 10 litres of coolant, but in actual fact it was no where near. I actually got out about 6 litres, of what looked like discoloured water. It had no smell like antifreeze so I was happy to know that the right mix would be going back into the system.


With the coolant drained I started to remove the thermostat, to get at the fixings I had to undo the top of the intake snorkel and move it over a bit. I also had to remove the EGR pipe.


The thermostat really didn't want to come away from the tubing connected to it, I found I had to undo the two bolts securing the plastic piping.


With the thermostat removed I compared new with old. They differ in design quite a lot, the old one has a considerably more substantial spring. The new one also has a little copper pip that acts as a tiny valve.

Old (left) - New (right)


 I fitted the new thermostat and got it all back together before doing the belts, to avoid getting anything in the engine block through the open hole where the thermostat sits.

With that all re-assembled I did the belts. It was very easy on this engine, which was a welcome relief after having a bit of a struggle with the rest of the work.

Belts on, it was time to reassemble the car. Before putting the fan and shroud back on I cleaned them up. Unfortunately I only got pictures of the fan cleaned up.


With everything cleaned up I filled up the coolant system with distilled water and the Comma Xstream G48 in a 50 / 50 mix. The system took about 7 litres, 1 litre more than came out, so it was obviously a little low before.

With the car all back together it started up fine. I took it for a drive and it warmed up as it should in around 3 miles. It also appeared to have a lot more poke, especially at low revs. I cannot understand why this is but a couple of people have said it felt quicker.

All in all a successful job.

Ecotune Primary Cat - Exhaust Fumes in Cabin

If you have noticed exhaust fumes in the cabin and / or the engine bay on your 3 series E46 diesel (in this case my 330d M57 engine), you may well have this same fault I am about to describe. I will also describe other possible faults that could cause these symptoms.


Since I bought the car, I had noticed a faint smell of exhaust fumes when the heater blowers were on and the car was stationary, at the lights etc. It gradually got worse until a couple of weeks ago I decided it had to be put right.

After going under the bonnet for a separate reason, instantly from start up fumes appeared in the engine bay, originating from under the air filter intake ducting / near the front right suspension top mount, shown in the picture below.


If the heater fans were on in the cabin, diesel could be smelt almost instantly. When driving along no fumes could be smelt even with the fans on, or so little fumes were getting in that it couldn't be distinguished. When sat at traffic lights or a junction, fumes once again started entering the cabin. Neither distance travelled nor engine temperature seemed to make any difference to the problem.

As the car is my daily commuter, I had to find some temporary fix whilst I found a more permanent one.

I found an extremely crude fix, which saves the unpleasant smell and headaches. Press the recirculate button until the green light is on to the top right of the button, as shown below. 

Do this just before you get to the lights or junction to avoid circulating the diesel fumes. Also don't leave it on this setting as the windows start to steam up, or at least they do in my car.


I did some searching on the net and this was the list I drew up as a conclusion.
  • Most likely - Flexi-pipe on the exhaust primary cat split - lower section of part 1 on this diagram
  • Split or cracked exhaust manifold - part 1 on this diagram
  • Badly sealing exhaust primary cat
  • EGR pipe split - part 1 on this diagram
  • Inlet manifold split (some doubt whether this would cause these symptoms)

Upon inspecting my car, it turned out that my flexi section on the primary cat was indeed blowing. It was pretty evident, as you can see in these photos.


I ordered a new section from Ecotune for £160, a darn sight cheaper than the £800 BMW quoted me for a replacement. This new one is stainless steel with a lifetime guarantee and a 2 year guarantee on the flexi section.


It turned out to be a real pain in the backside getting the old cat off, there just isn't enough room for manoeuvre in and around the turbo. In the end I had to get the whole exhaust assembly off to fit the new pipe. It was a bit of a faff getting it back on as well. At least it didn't have a lambda sensor in though, all pre 2003 models weren't fitted with one. The sensor could have made things very interesting. Here's a shot of the old primary cat with no sensor, if it had one it would be sticking out somewhere in the middle of this shot.


Anyway, after 5 hours under the car it was all back together and running sweetly. No fumes could be detected whilst stationary with the fans on.

Rear Brake Discs and Pads Replaced

This post also serves as a guide on How - To replace the rear brake discs and pads on a BMW E46 3 series 330d.

As mentioned in my previous post about replacing the parking brake shoes, the rear discs were measuring roughly 18mm, a full 2 and a bit mm smaller than the minimum thickness specified as 20.4mm.

How the discs were allowed to get to such a state by the previous owner I do not know.

Nevertheless I deemed it time to refresh the whole rear brake assembly.

I settled on a set of Pagid discs and Pagid pads, as these are highly recommended and often regarded as the best option. The correct size discs for the 330d is 320 x 22mm vented.

I picked these up at the same time as the brake shoes, for near enough £100.


*Please note, this is a guide on how I performed the replacement, not full BMW approved instructions. You should not attempt any work if you are not fully equipped and competent enough to do the job. I will also not be held responsible for any damage caused to your car from incorrectly following this guide.


Tools you will need

  • Jack
  • 10mm long socket
  • 7mm Allen Hex bit socket
  • 16mm socket
  • 17mm socket
  • Locking wheel nut bit
  • Torx T40 bit socket
  • Ratchet
  • Flat Head Screwdriver
  • Wire brush (optional for cleaning)


Step 1

Crack the nuts on the rear wheels using your 17mm socket. Then get the rear end jacked up safely on stands. Fully remove the wheels once jacked up, which should leave you with this.


Step 2

Taking a flat head screw driver, lever off the clip on the brake calliper. It can take a bit of doing, but just persevere, trying not to slip with the screw driver as you could cause unwanted damage to various components. I also decided to give my clips a wire brushing whilst they were off, just to clean them up a tad.


Step 3


Next take your Torx T40 bit and crack the fixing on the discs to the hub. It shouldn't take much effort, but you might need to hold the disc to stop it moving.


Step 4


Working behind the calliper now, prise the two fur tree plastic caps off of the calliper pin sockets. It shouldn't take much effort, you should be able to do it by hand, if not carefully use a flat head screw driver.


Step 5

With the caps removed, take the 7mm Allen bit socket and remove the two calliper pins. You might need to tease them out of the rubber surrounds with a screw driver on the thread from the side.


Once removed the calliper will pull away, if the discs are significantly worn it might take a little bit of force to pull the pads over the lip or build up on the outside of the discs. Rest the calliper safely on something, do not let it hang. You might want to clean it up while you have it off too, mine were pretty well caked in brake dust and grime. Make sure to avoid damaging the piston gaiter though!

Before (left) and After (right)


Calliper removed


Step 6


With the calliper removed, still working behind the brake set-up, take the 16mm socket and undo the two set screws fixing the carrier to the hub. These will be tight so it will take quite a lot of force.


When the set screws are removed the carrier will just come away from the disc. Again, you may wish to clean the carrier up, mine was caked up with crud pretty bad.


Step 7


Fully undo the screw holding the disc to the hub, which was cracked earlier with the T40 Torx bit. The disc should then pull away. It might be ceased on so could require a bit of persuasion by way of a tap with a rubber hammer. As mine were so low I decided to weigh them, to see just what difference 4mm reduction in material makes. Turns out the old discs were 6.1kg and the new ones 7.2kg. So that's over a kilo per disc gone in material.


With the disc removed it should look like this.


At this point, if you want to replace your parking brake shoes, you should follow the how - to guide to replacing the parking brake shoes on a BMW E46 3 series 330d in this post, Parking Brake Shoes Replaced.


Step 8


Take your new disc and put it on the hub, replace the Torx head screw and tighten it hand tight for now. Also replace the carrier, making sure the 16mm set screws are very tight.


Step 9


Using a G-Clamp, compress the piston in the calliper. Keep an eye on the brake fluid level under the bonnet, don't let it overflow or rise too high. Once compressed, put your new brake pads in. Note, you will have to replace your pad sensor, or swap the old one to the new pads as long as the warning light hasn't come on in the dash.

Here's a comparison of the old and new pads.


Step 10


Refit the calliper and tighten the retaining pins using the 7mm Allen bit socket, replace the fur tree type caps and then finally replace the calliper clip. Also make sure to tighten up the Torx head screw in the disc, ensuring the disc is properly seated. You should now have a shiny new brake set-up, something like this.


All that now remains to do is replace the wheels and lower the car back down. Pump the foot brake to re-adjust the pads to the discs. You should expect the discs and pads to have to bed in before they are at peak performance.
sarah lous textiles Proudly Powered by Blogger