MOT - 2012 - Pass

Yesterday was the first MOT under my ownership of the car, I was more than a little nervous about it due to the 130k miles on the clock.

Booked it in and went to get it tested, a painfully long wait later and I was told the car had failed. Not good, fearing a wallet bashing I asked on what. The list read;

Parking brake efficiency - 11%
Rear D/S and P/S indicator bulbs were the wrong colour, in other words the orange coating on the bulbs had started peeling off.


That's it? Fantastic, but my parking brake shoes are brand new why aren't they working right? After a bit of discussion the guy at the test centre said you need to bed the shoes in a bit. So on the drive to buy two new amber indicator bulbs I put the hand brake semi on for a short period. 

I picked up the replacement bulbs for £3, nice and cheap, then went back to the test centre.

They brought it back in and tested the handbrake, this time it was a-ok.

A 10 year old car failing for a couple of discoloured bulbs and brake shoes that weren't bedded in isn't too bad at all, very happy with the result.

Passenger Occupancy Sensor Bypass

When I bought the car I knew it had the SRS warning light illuminated, I had done some research into it before I bought the car though. It turned out that the most common cause of this light is the passenger occupancy sensor has gone a miss.

This sensor failing appears to be very common place, so much so that repair kits are readily sold on eBay to 'fix' it. These kits don't fix the occupancy sensor, they just bypass it, tricking the on board computer into believing the passenger seat is always occupied. Some might say it's a bodge, but my opinion is that if I am in an accident where the airbags fire, the least of my worries are going to be whether the passenger seat is ruined and how much it's cost me.

I went ahead and bought the kit from eBay, I was aware that you can make your own bypass but the kits on eBay are plug and play as it were, leaving no lasting effect on the car.


The instructions that came with the bypass kit said you could do the repair with the seat in place, but I'm not a contortionist so I decided I'd have the seat out and do it in comfort. I set about removing the seat, which was very easy, just one bolt into the seat belt, two into the rear of the runners, and two nuts on the front of the runners. I tilted the seat back to find this mess, and two 1p coins.


Glad I was having the seat out after all. On the passenger side there are two connectors, on my car they had yellow connector plastics. The connectors come apart really easily, which was a welcome relief, I've had grief with them on my previous car before.


 With the seat removed I could get stuck in with cleaning up the mess. I started off by using some disinfectant carpet cleaner, household stuff the same as what I used in the boot in the previous post - Boot Thoroughly Cleaned.


I dried the area off then finished with some febreze, a vast improvement indeed. Onto the actual reason for having the seat out, fitting the occupancy sensor bypass. This job was real easy, just disconnect the sensor and plug in the bypass, tidying it up by cable tying it in place.


 Bypass fitted it was now time to get the seat back in, just a case of reversing the above. As it was so easy, and due to the state of the passenger side, I decided to have the driver's side seat out as well and give that a good clear out.

Under the driver's seat was less muck but still not ideal, however, there was a nice £1 tip for me.


After both sides were cleaned I set about resetting the fault code on the dash. I managed to borrow a friend's (cheers Rich) SRS code reader/resetter, which saved quite a bit of hassle.


The code reader plugs into the OBD II port under the driver's side IP (instrument panel/dash) lower, near the pedals. When you plug it in and turn the key to position 2, the code reader will display FA, which when selected will show all the fault codes related to the SRS. Mine showed up the code 70, which means there is a fault with the passenger occupancy sensor, as expected. Restarting the code reader, you can now select cA, which is used to clear all codes. After clearing the codes, the light on the dash flashed then went out. It has not reared it's head since, for once a nice simple job.


Boot Thoroughly Cleaned

When I was vacuumimg out the boot I noticed it wasn't smelling to sweet.

(This was just after I bought the car, I haven't left it this long, just haven't typed it up yet).

I lifted the carpet and was greeted with a nice mould covered spare wheel cover.

I was most definitely not having that.

I stripped out all the panels in the boot, all carpets and the spare wheel and set about them with disinfectant. I also fully disinfected the boot, spare wheel well and all side carpeting.


After about 2 hours of cleaning I was happy with the state of the boot. To finish up I sprayed some febreze in there and used some Poorboy's Natural Look trim cleaner, which I have to say is excellent and highly recommended, and smells amazing.


Here's a before and after of the battery cover, using the Poorboy's.


And the finished boot.


Snow Foam Kit

I'd been after a snow foam lance for some time after seeing it being used to great effect by amateur detailers.

Trouble was I didn't have the right pressure washer for the job either, I had an old that finally gave up the ghost in a quite impressive manor, spraying water out of every seam of the machine.

Anyway, I went and ordered myself a pretty decent Karcher one from Tesco as it was on offer at the time.

My excellent girlfriend then ordered me a snow foam lance with the connector to match from Clean your Car. She also got me some Valet Pro pH neutral snow foam from the same place.

So here's the not very happy old pressure washer and below that all my new kit assembled.


New Kit


The elements had been against me for the last 7 weeks; the flu, bad weather and odd jobs cropping up halted my usual religious weekly cleaning regime. As you might expect, doing 200 miles a week the car was looking a little untidy.

Anyway I got to spraying the car with the snow foam, this part is great fun, gets some funny looks from passers by as well. It is a lot more covered when you just spray it on, but by the time I'd sprayed it and then got the camera out and took the shots it had ran off a bit in areas.


Every time I use the snow foam though, it surprises me how well it brings the car up without me even having to touch it. As you can see below in the before and after pictures it really does work well, I couldn't recommend the kit enough. I will be using it before every wash in future, it only adds around 20 mins to the wash time as well.


LED Sidelights and Xenon Fog Lights

With the new Xenon Headlight Bulbs and the disappointingly yellow sidelight bulbs I bought back in October, the front end was a bit of a miss match of light colours.

I decided I would try again to find a decent sidelight bulb. At the same time I'd get the matching fog light bulbs to the headlight ones. This should then fully tidy up the front end, in theory...

First up is the fog lights, this was a simple enough procedure, ordered a set of HB4 55w Ice Blue Xenon Fog Light Bulbs from aceparts.com.


They are just the same as the headlight bulbs but with a different connector. Upon taking out the old ones, I spotted the logo on the back, they were Phillips ones, so quite high quality to start with.


Anyway, on with the comparison of new with old, on the left below are the standard fog light bulbs and on the right the new ice white xenon bulbs.


As you can see, a massive improvement, nice and white like the headlight bulbs. They also make a nice contribution to the amount of light produced, as you can see below, fogs off on the left, fogs on on the right.


The keener eye'd reader will notice the sidelights are already changed for white bulbs in the pictures above, these are actually a set of bulbs I had to return, more on that below.


I then went and ordered some 9 SMD LED tower sidelights, again from aceparts.com. These arrived and seemed promising, certainly should be enough LEDs anyway.


I went and tried one of them, plugged it into the socket but left it out of the headlight casing. When turned on it was very bright, and nice and white. Great, now just to put it back in the casing and all is well, however, the bulbs had other ideas. Due to the amount of LEDs these are quite wide, just wide enough that they won't fit in a E46 headlight casing. So these got repackaged and sent straight back to aceparts.

Next I ordered a set of White Quad LEDs, from aceparts. Once they arrived I went out and tried them, first impressions weren't very good as they didn't hold well in the plugs. I tweaked the metal connectors to be a bit tighter then pressed on. The bulbs lit up quite blue, not the white I was hoping for. They also flagged up the blown bulb error on the dash. Finally, they also caused another odd error, with the sidelights on and the engine off, it caused the indicators in all corners to be permanently on. Needless to say these bulbs also got sent back.

As a last ditch effort I decided to go ahead and order a set of 5 SMD LED tower bulbs off of eBay after a forum member recommended them.

When these arrived they looked very promising, good build quality and quite slender.


Above you can see the new bulbs compared to the 'white' xenon ones. Quite a bit bigger, but thankfully, slender enough to get through the E46 headlight casing hole. Here's how they fit into the plug.


Onto the interesting bit, how they light up. I am pleased to say that they are absolutely spot on, producing a brilliant white light (the blue tint in the photos come from the headlight bulb's blue tinted glass). Below you can see the car with a new bulb on the left and the old 'white' xenon bulb on the right.


Much better I think you will agree. Now, importantly to compare them to the other white xenon headlight and fog light bulbs. First up, a comparison of old vs new next to the headlight bulbs. They are actually a closer match than it looks here.


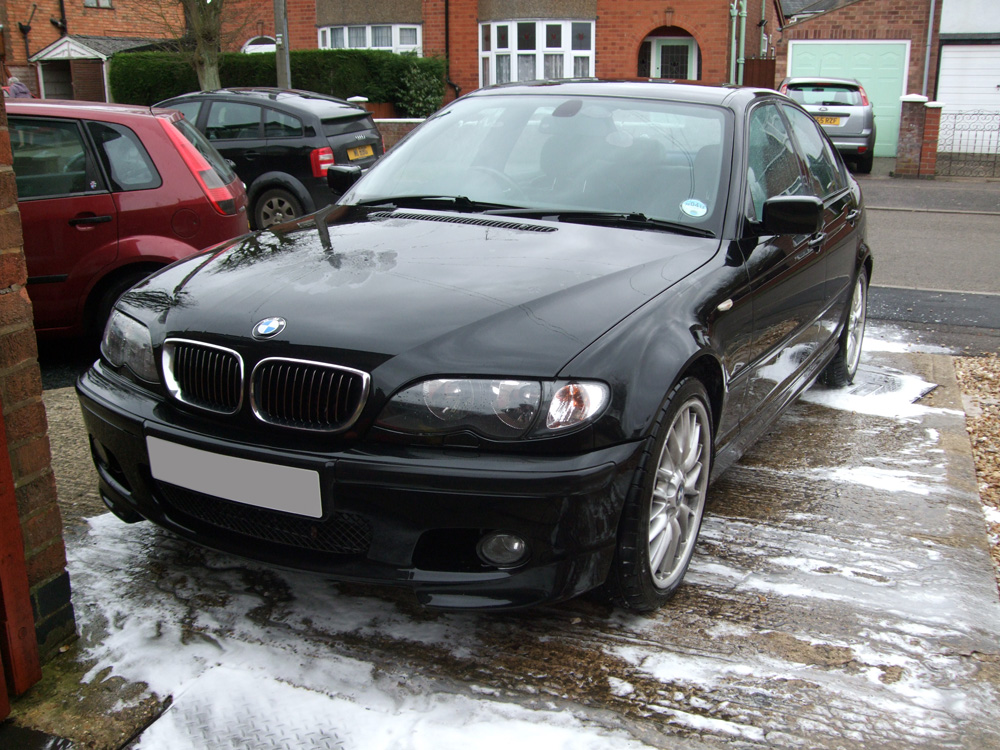
And finally, the whole set now nice and unified in colour. A fantastic freshen up to the front end in my opinion. The light produced is much easier on the eyes at night too, so all in all worth the effort.


The image below shows the light produced just by the sidelights, although it doesn't look it here, they actually do produce quite a lot of light.

And last but not least, all lights on.


sarah lous textiles Proudly Powered by Blogger