Rear Inner Tail Lamps Replaced

Each time I washed the car I could see water streaming down the inside face of the inner rear boot lid tail lamps. Green mould was now starting to form in the outer top corners of the lamps, which looked rather unsightly.

I started searching for lamp prices, initially with eBay, but I didn't really trust that they would be good quality.

So I turned to BMW Genuine Parts, expecting a cringe-worthy quote to which they didn't disappoint, and also eurocarparts.


BMW Genuine Part - £121.37

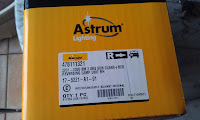
eurocarparts, Astrum branded - £32.40 (inclusive of a 25% forum discount)


It's quite obvious which one of the two I was going to chose out of those.

I got them ordered and went to pick them up, one of the boxes was labelled up in full retail print, the other box was just plain. Here's the retail box and how the light units appear straight out the box.


e46 saloon astrum lamp boxe46 saloon astrum lamp box

e46 astrum rear tail lamp


Cracking straight on with the job, I got the trim pullers out and removed the boot lid inner moulding clips, to allow access to the back of the lamp units.

removing e46 boot trimremoving e46 boot trim


Removing the lamps is a case of popping off the bulb holder unit, then undoing one nut. The lens unit then tilts and pulls out from the outside of the car.

e46 rear bulb holder


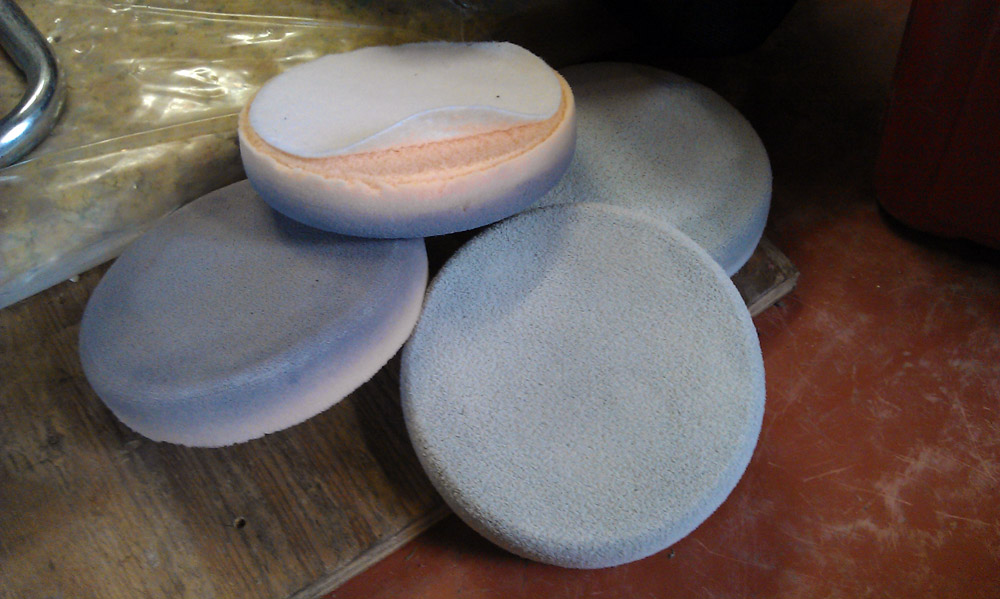
Removing the lenses revealed a small build up of dirt and grime, expected due to the cars age. I gave it a good clean up and sealed the paint with some Dodo Juice Purple Haze.


Before (right) and After (left)


With the old lenses out I took a photo to compare the two next to each other, it really shows up how bad the old ones were.


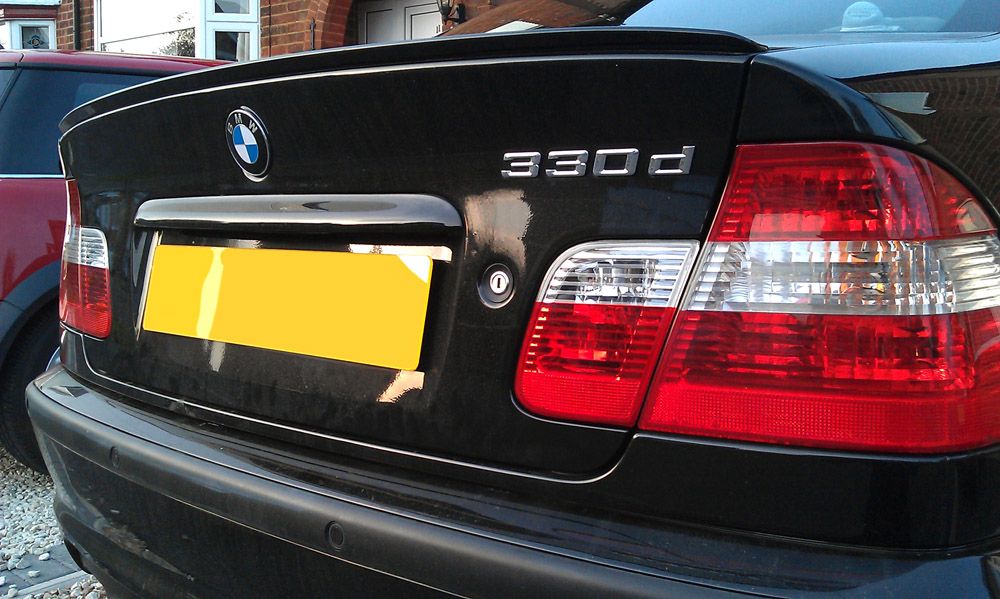
And finally then, the new lenses were fitted and everything reassembled. For the small cost, it has made a big improvement to the back end of the car, really freshening it up and bringing it in line with the rest of the car. Well recommended if your lenses are looking equally as sorry for themselves as my old ones were.

Functionally too, these lenses aren't letting in any water during jet washing or just normal hosing down, which is the fundamental reason they got changed in the first place. So I can give the thumbs up to the Astrum product too.
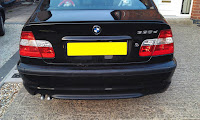
Before


Before (right) and After (left)

e46 rear lightse46 rear lights

e46 saloon rear ende46 saloon rear end

After

e46 saloon rear end angle


Machine Polished and Colour Corrected

I've always admired the results achieved by people using machine polishers, and was keen to try it out myself on one of my own cars. However, due to the cost of the kit, as a student I couldn't really afford to get one worth having to use on my old Rover 25.

Late last year though, my folks got me the one I was after as a present for my birthday, which I was over the moon about. Unfortunately, the bad weather set in and I couldn't really make use of it. As soon as the weather started turning this year though, I was straight out and got to work.

So here's the kit I've got together;
  • 1 x CleanYourCar DAS-6 PRO Machine Polisher
  • 2 x Menzerna Compounding Pads (5")
  • 2 x Menzerna Polishing Pads (5") 
  • 2 x Menzerna Finishing Pads (5")
  • 1 x 250ml - Menzerna Power Finish 2500 
  • 1 x 250ml - Menzerna Final Finish 3000
  • 1 x 250ml - Menzerna Super Finish 4000
  • 3M Scotch 3434 Tape
  • Dodo Juice Purple Haze Wax


With all the kit assembled I got on with the polishing. Rather tediously though, each panel had to be washed, clayed and taped prior to polishing. This meant that the average time per panel was 1hr 30mins.

Having tried a low end machine polisher before, I was aware just how much polish dust gets into gaps and nooks, so I spent quite some time taping off to reduce this as much as possible.


Anyway, the first panel to get some TLC was the bonnet, as this is such a large panel I split it into two halves, so overall it took 3 hours to do.

The general process was as follows;
  1. Wash
  2. Clay
  3. Dry
  4. Tape
  5. Polish
  6. Wax x 2 layers.

As the bonnet was quite badly swirled up, I had to use the compounding pad with the power finish 2500.

I added a few blobs of power finish to the pad and dabbed it round the panel, then did a number of passes at a slow rpm with no pressure to allow the polymers to breakdown.


With the polymer broken down I wound up the rpm and started the polishing process, alternating between horizontal passes and vertical passes to make sure all areas were covered.

On every panel I finished off with a finishing pad and super finish 4000, once the polish was buffed off with a microfibre I added two layers of Dodo Juice purple haze.

It was quite difficult to show on the bonnet but here are the before and afters, trying to compare like for like views, with and without swirls. 

Before (left) and After (right)


Reflection shot after waxing


Very encouraged by the results I pressed on over the following week and finished the whole car off.

Overall the whole process took me around about 20 hours to complete, followed by a final wash and layer of wax which took a further 3 hours.

Here's the rest of the photos I took throughout the process, thrown in are some reflection shots to try and show the level of gloss achieved.

Roof
Before (left) and After (right)


Horizontal half and half (nearest half is corrected)


Before (left) and After (right)


Finished


Boot Lid
Before (left) and After (right)


Finished


Unfortunately didn't get many photo's of the front fenders being done, but did get a before and after shot of the front passenger side.

Before (left) and After (right)


Again, I was concentrating on getting the polishing done in a timely manor rather than taking pictures at this point, so from here onwards there aren't many pictures. Nevertheless here are the results I got with the front passenger door.


After I'd done all the doors, I did the entire back end in one go (an entire Friday afternoon). I only have the after pictures of the back end, so don't try to compare.


After more than 20 hours of washing, claying, polishing, waxing and buffing it was finished. Was it worth it? Absolutely yes, the car looks completely different, the colour is deeper, reflections crisper and has taken 3 or 4 years off the cars age.

As for the kit I used, I can't fault the machine polisher at all. The only thing I did was to remove the D shaped handle seen in the first picture, I found it easier to just hold the top of the orbital (the black bit) as it gave you more control.

The Menzerna polish and pads were excellent, they managed to remove all the swirls completely, and significantly dulled the appearance of scratches and stone chips. The pads were on their last legs by the end of the job though, so if you plan to do a whole car like I have you WILL need at least 2x each pad type.


The Dodo Juice Purple Haze wax is absolutely fantastic. The initial cost of £30 a tub might put some people off, but believe me when I say this will last you years. I must have used about 3mm of wax to do three layers of the entire car, at that rate I could do well over a hundred layers with one tub.

So without further a do here are the photos of the results, they don't really do the paintwork justice, but still look good. Enjoy.


sarah lous textiles Proudly Powered by Blogger